
PRODUCTS
‹
›
1、 Overview
The 2013 updated version of this electric gauge is a marking instrument designed specifically for testing the elongation of steel bars. Due to its uniform and stable rotation speed, as well as higher accuracy and easier operation compared to manual gauges.
2、 Technical parameters
1. Power input voltage: 220V/50hz
2. Gauge length: 300mm
3. Printing spacing: 5mm 10mm
4. Printing accuracy: ≤ ±0.03mm
5. Dimensions: 710 * 240 * 300mm
6. Weight: Approximately 30kg
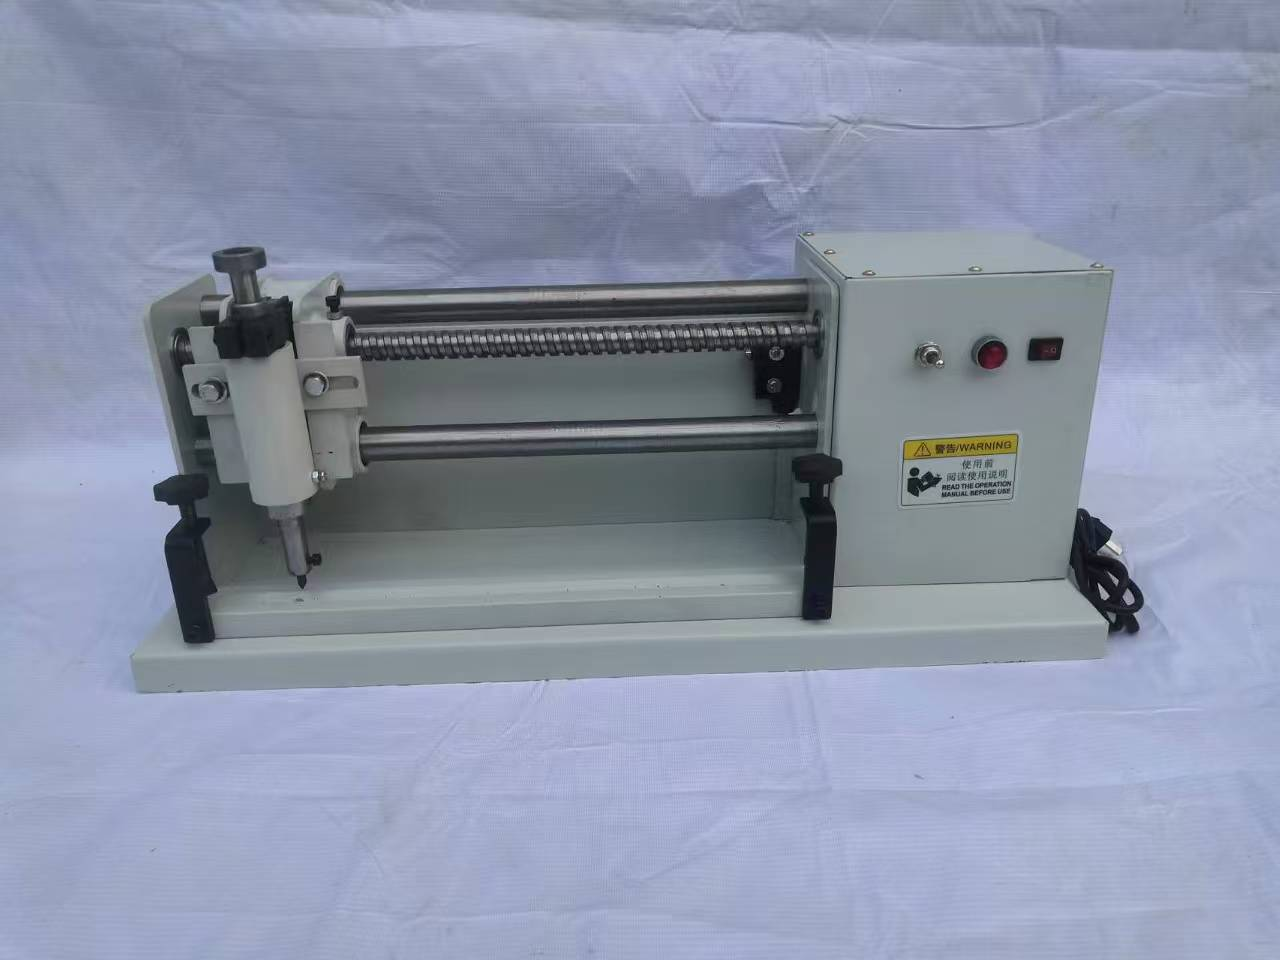
3、 Construction
This machine consists of a base, support frame, V-shaped groove, printing assembly, and electrical components, and is manually driven by a handwheel.
As shown in the picture:

1. Base 2, V-shaped groove 3, printing assembly 4, height adjustment handle 5. Reinforcement fixing screw 6, electrical control box 7, gauge change screw
4、 Operation method
1. Firstly, determine the straightness of the steel bars, and the coaxial deviation of the steel bars should not exceed 1mm.
2. To determine the printing distance, the method of adjusting the distance is to loosen the fixing screws 7 on both sides of the printing assembly. The taper rod sleeve should be moved to the left end by 10 millimeters and to the right end by 5 millimeters, and then tighten the fixing screws 7.
3. Adjust the height handle 4 to firmly place the steel bars into the V-shaped groove (with the straight edge of the ribbed steel facing upwards).
4. Adjust the height handle 4 so that the cone tip reaches the steel bar and then descends about 1-2mm.
5. Connect the power supply, turn on the power switch, the power indicator light will be on. If the printing assembly is in the middle position, the work indicator light will also be on. At the same time, the printing assembly will automatically stop when it reaches the leftmost end, and the work indicator light will be off
6. Turn the direction switch to the right position, and after the motor runs, the printing assembly line will automatically stop at the far right end.
7. Lift the cone rod, loosen the sturdy screw, remove the steel bar, and print it out.
8. Turn the direction switch to the left position again. After the motor runs, the printing assembly line will automatically stop at the leftmost end to maintain the preparation state for the next work.
5、 Precautions
1. Reliable grounding before use.
2. This instrument should be kept clean regularly and stored in a dry place.
3. Lubricate the sliding parts frequently.
MESSAGE
MESSAGE
RECOMMEND PRODUCTS
RECOMMEND PRODUCTS
 Rebar Marking Machine
 RC-32 steel bar cutting machine
 HM-YN1 Kinematic viscosity tester
 Fully automatic pour point analyzer HM-NQ3
 Automatic open flash point tester HM-KS
 Anchor rod puller
 Laboratory Oven
 Cement hydrometer
 Plastic Door And Window Angle Strength Testing Machine
 Asphalt Compactor
 Temperature Bath
 Marshall Machine
") Asphalt (Gmm/Vacum pump)
Asphalt (Gmm/Vacum pump)") Asphalt (Gmm/Vacum Pump)
Asphalt (Gmm/Vacum Pump) Slump Test Set
 Concrete Core
 Handheld Multi -Channel
 Sand cone
 Vernier Caliper
") Hot plate (20*40 CM)
Hot plate (20*40 CM) Compressive Strength automatic
 Point load test
 CBR machine Automatic
 Digital Balance
 Balance
 Digital Balance
 Digital Balance
 Liquid limit device
 CBR machine Automatic
 Automatic Los Anele,Abrasion Machine
 Direct shear digital
 Consolidation test digital
 Dial Indicator
 Automatic pressure regulating concrete impermeability tester


")
")


")


Get real-time quotes
Interested? Leave your contact details.